Lost your bookmark again? Dog-eared pages making you cringe? Don't worry, you don't need to run out and buy a new one. In fact, you might already have everything you need to create something even better, right at home!
Let's face it, sometimes the simplest things can be the most frustrating. Hunting for a bookmark, only to come up empty-handed, is a common experience for book lovers. And resorting to folding the corner of your page? A book lover's nightmare! Plus, many bookmarks are just…well, boring. They lack personality and don’t reflect your unique reading style.
This post is for the avid reader, the craft enthusiast, the budget-conscious individual, and anyone who wants to add a personal touch to their reading experience. We'll explore the wonderful world of DIY bookmarks using readily available household supplies. Prepare to unleash your creativity and transform everyday items into unique and functional page markers!
Get ready to discover how to craft personalized bookmarks using materials you probably already have in your home. We'll explore different techniques, from simple paperclip transformations to fabric scrap masterpieces. This guide will equip you with the knowledge to create unique, budget-friendly, and personalized bookmarks that add a touch of flair to your reading adventures. We'll be covering material selection, crafting techniques, and even adding decorative elements. The goal is to transform your everyday reading experience with these DIY bookmark ideas using household items!
Unleash Your Inner Artist: The Joy of DIY Bookmarks
The aim of this section is to showcase the fun and creativity involved in making your own bookmarks. It highlights the therapeutic aspect of crafting and the satisfaction of creating something useful and beautiful with your own hands. This encourages readers to see bookmark making as a relaxing and enjoyable activity, not just a practical solution.
I remember when I was a kid, my grandmother, a librarian with an endless supply of stories and a penchant for all things crafty, taught me how to make bookmarks out of pressed flowers and laminated paper. The entire process, from carefully selecting the blooms in her garden to painstakingly arranging them on paper before sealing them, felt magical. It wasn't just about having a bookmark; it was about preserving a memory, a moment in time, within the pages of a book.
That early experience sparked a lifelong love for DIY projects, and I've found that creating my own bookmarks offers a similar kind of satisfaction. There's something incredibly rewarding about taking ordinary items, like colorful yarn or leftover buttons, and transforming them into something both functional and aesthetically pleasing. DIY bookmarks are more than just placeholders; they're a chance to express your creativity and personalize your reading experience.
The joy of DIY bookmarks goes beyond simply saving money or finding a practical solution to a common problem. It's about the process itself, the opportunity to slow down, engage your imagination, and create something unique. It's a way to infuse your reading with a personal touch, to add a little bit of yourself to the stories you love. Whether you're a seasoned crafter or a complete beginner, making your own bookmarks is a surprisingly fulfilling and therapeutic activity. The possibilities are endless, limited only by your imagination, and the end result is a tangible reminder of your creativity and your love for reading.
What Makes a Great DIY Bookmark?
This section aims to define the qualities of a good bookmark, both from a functional and aesthetic perspective. It emphasizes durability, thinness, visual appeal, and personalization. This guides readers in choosing materials and designs that will result in bookmarks that are not only beautiful but also practical and long-lasting.
A great DIY bookmark is more than just a strip of paper. It's a carefully considered creation that balances functionality and aesthetics. Functionally, it needs to be thin enough not to damage the spine of your book, durable enough to withstand repeated use, and long enough to easily mark your page. Aesthetically, it should reflect your personal style and add a touch of visual interest to your reading experience. It can be a miniature work of art, a conversation starter, or simply a reminder of a special memory.
Durability is key. You want your bookmark to last, so choose materials that can withstand the wear and tear of daily use. Think sturdy cardstock, laminated paper, or even fabric scraps. Thinness is equally important. A bulky bookmark can damage the delicate spine of your book, so opt for materials that are relatively flat. Visual appeal is where you can really let your creativity shine. Consider incorporating colors, patterns, and textures that you love. You can use paint, markers, fabric scraps, beads, or even pressed flowers to create a truly unique design.
Personalization is the final touch that elevates a good bookmark to a great one. Consider adding a quote from your favorite book, a picture of your pet, or even a simple monogram. The possibilities are endless. The goal is to create a bookmark that is not only functional and aesthetically pleasing but also a reflection of your personality and your love for reading. Ultimately, a great DIY bookmark is one that you enjoy using and that adds a little bit of joy to your reading experience.
A Glimpse into Bookmark History and Lore
This section aims to provide a brief historical overview of bookmarks, highlighting their evolution from ancient methods of page marking to the modern-day decorative accessories we know and love. This adds depth to the topic and connects DIY bookmark making to a larger cultural context, making it more engaging for readers.
Bookmarks, in their simplest form, have been around for centuries, evolving alongside the written word itself. In ancient times, when books were precious and meticulously crafted, scribes and readers used a variety of methods to mark their place, from simple scraps of papyrus to elaborate leather thongs adorned with jewels. These early bookmarks were not just practical tools; they were symbols of wealth and status, reflecting the value placed on literacy and knowledge.
As printing technology advanced and books became more accessible, bookmarks evolved as well. In the medieval period, bookmarks were often made of parchment or vellum, and they were sometimes attached to the spine of the book with a ribbon or chain. During the Renaissance, bookmarks became more ornate, featuring intricate designs and delicate embroidery. By the Victorian era, bookmarks had become a popular collectible item, with a wide range of materials and styles available, from silk ribbons and beaded tassels to silver filigree and hand-painted porcelain.
Today, bookmarks are as diverse and varied as the books they mark. They range from simple paper slips to elaborate works of art, reflecting the individual tastes and preferences of their owners. And while the materials and designs may have changed over time, the fundamental purpose of the bookmark remains the same: to help us navigate the pages of our favorite books and keep our place in the stories we love. Understanding the history of bookmarks adds a new dimension to the DIY experience, connecting us to a long and rich tradition of book lovers and their ingenious ways of keeping their place.
The Secret Language of Bookmarks
This section aims to explore the symbolic meaning and personal significance that bookmarks can hold. It encourages readers to think beyond the practical function of bookmarks and consider them as objects that can reflect their personality, interests, and memories. This adds an element of introspection and encourages readers to create bookmarks that are meaningful to them.
Beyond their practical function, bookmarks can often hold a secret language, a silent code that speaks to our personal stories and the worlds we inhabit within the pages of a book. A well-chosen bookmark can be a reflection of our personality, a subtle clue to our interests, or a tangible reminder of a special memory. It can be a conversation starter, a symbol of our love for reading, or simply a little piece of joy that brightens our day.
Think about the bookmarks you've collected over the years. Do you have one that was given to you by a loved one? Perhaps a bookmark you picked up during a memorable trip? Or maybe a bookmark that features a quote or image that resonates deeply with you? Each of these bookmarks tells a story, not just about the books they've marked, but about you, the reader. They are tangible representations of your experiences, your values, and your connections to the literary world.
The secret language of bookmarks can also extend to the materials they are made from. A bookmark crafted from a piece of fabric from your grandmother's quilt might evoke feelings of nostalgia and warmth. A bookmark made from a pressed flower from your garden might remind you of the beauty of nature. And a bookmark decorated with a quote from your favorite author might inspire you to live your life with more passion and purpose. So, when you embark on your DIY bookmark project, consider the message you want to convey and choose materials and designs that speak to your heart.
Top DIY Bookmark Recommendations: From Simple to Stunning
This section aims to provide a range of DIY bookmark ideas, catering to different skill levels and preferences. It offers step-by-step instructions and visual examples to inspire readers and guide them through the crafting process. This ensures that readers have concrete ideas to work with and can successfully create their own bookmarks.
Ready to dive into the world of DIY bookmarks? Here are a few recommendations to get you started, ranging from simple projects perfect for beginners to more intricate designs for seasoned crafters:
- Paperclip Bookmarks: This is the ultimate beginner-friendly project. Simply bend a large paperclip into a decorative shape, such as a heart, star, or initial. You can add beads, ribbons, or charms for extra flair.
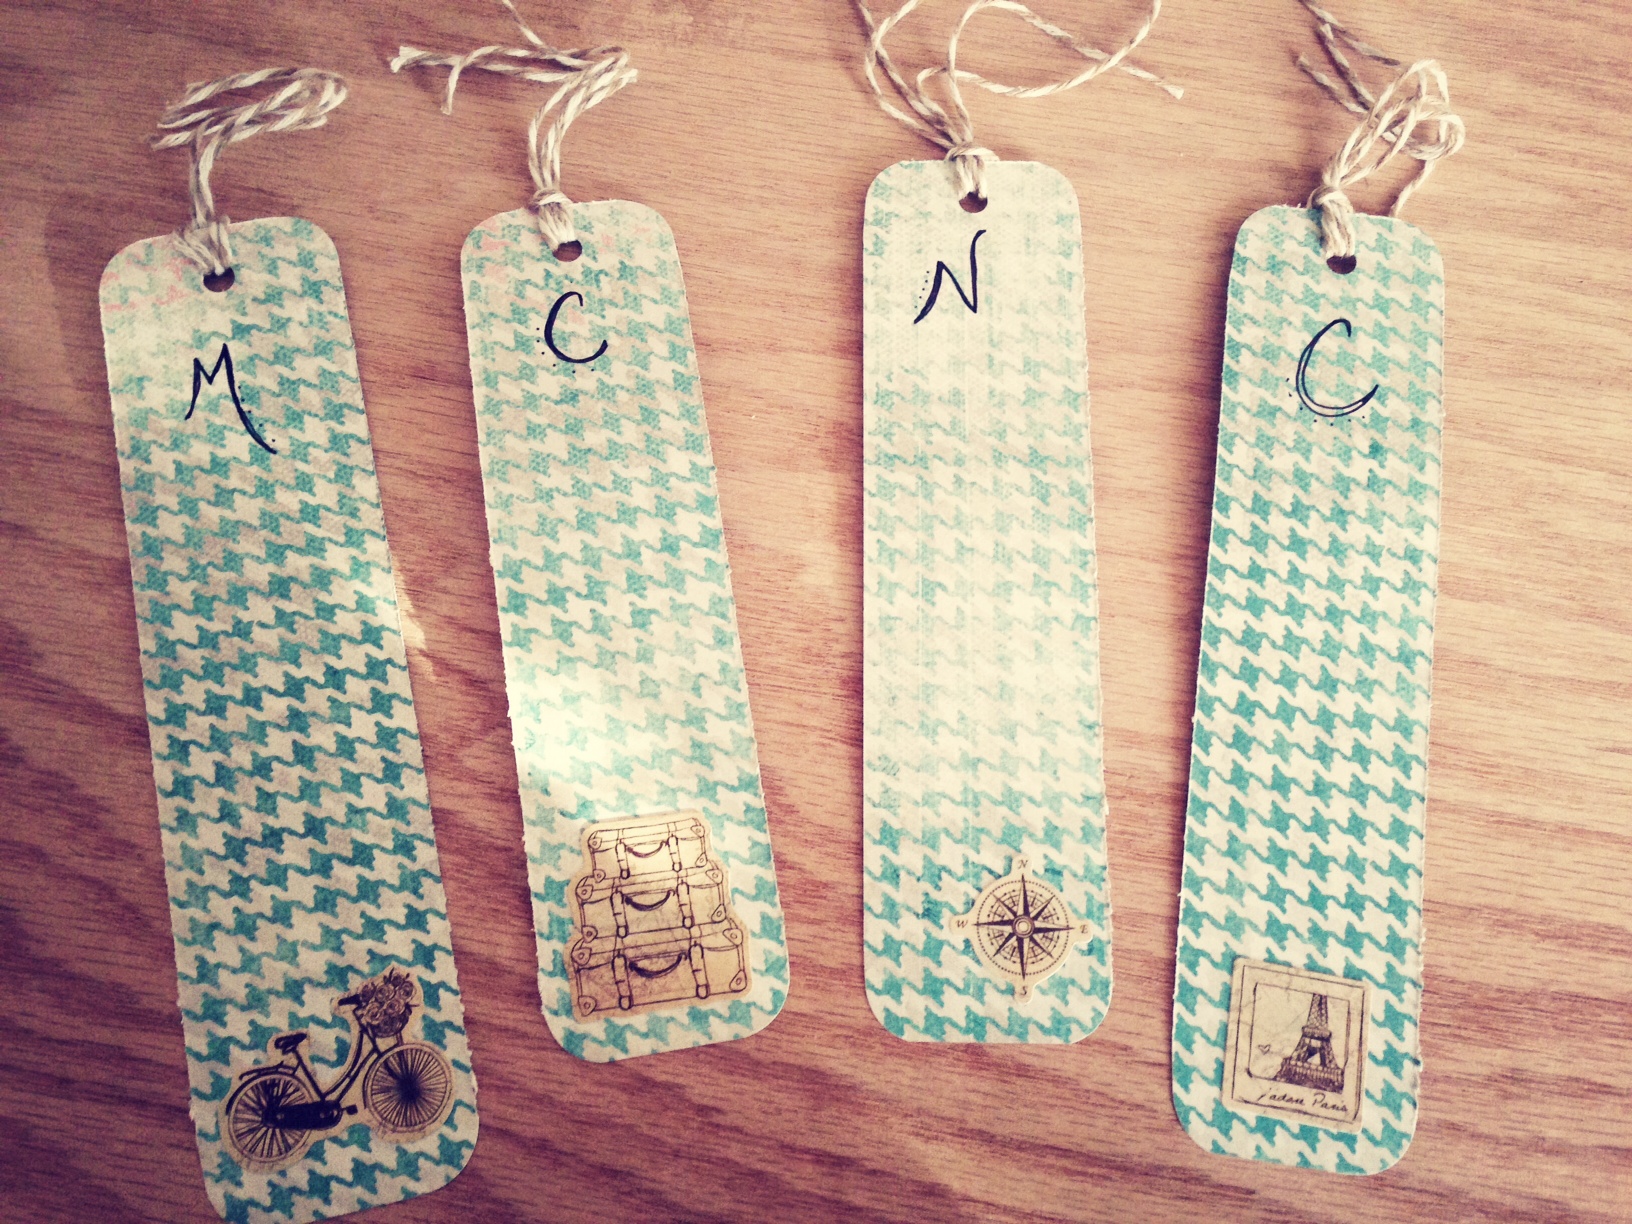
- Washi Tape Bookmarks: Cover a strip of cardstock with colorful washi tape. Trim the edges and add a tassel or ribbon for a polished look. This is a great way to use up leftover washi tape scraps.
- Fabric Scrap Bookmarks: Cut two pieces of fabric into a rectangle shape and sew them together, leaving a small opening. Turn the bookmark right side out, stuff it lightly with batting or fabric scraps, and sew the opening closed.
- Laminated Photo Bookmarks: Print out your favorite photos, cut them into bookmark shapes, and laminate them for durability. This is a great way to personalize your bookmarks and add a sentimental touch.
- Watercolor Bookmarks: Experiment with watercolor paints on watercolor paper. Create abstract designs, landscapes, or floral patterns. Once dry, laminate the paper for durability.
These are just a few ideas to get you started. The possibilities are truly endless. Don't be afraid to experiment with different materials, techniques, and designs to create bookmarks that are uniquely your own. Remember, the most important thing is to have fun and let your creativity shine!
Essential Tools and Materials for DIY Bookmark Success
The intention of this part is to list essential tools and materials needed to get started with DIY bookmarks, covering basic supplies like scissors, glue, and paper, as well as more specialized items like laminators and decorative embellishments. This provides readers with a comprehensive shopping list and ensures they are well-prepared for their crafting projects.
Before you embark on your DIY bookmark adventure, it's essential to gather the necessary tools and materials. Having the right supplies on hand will make the crafting process smoother and more enjoyable. Here's a list of essential tools and materials to get you started:
- Scissors: A good pair of scissors is essential for cutting paper, fabric, and ribbon.
- Glue: Choose a glue that is appropriate for the materials you will be using. Craft glue, hot glue, or glue sticks are all good options.
- Paper: Cardstock, construction paper, watercolor paper, and scrapbook paper are all great options for making paper bookmarks.
- Fabric: Scraps of fabric, felt, or ribbon can be used to create fabric bookmarks.
- Decorative Embellishments: Beads, buttons, charms, sequins, glitter, and washi tape can be used to add extra flair to your bookmarks.
- Laminator: A laminator is optional, but it can be used to protect and preserve your bookmarks.
- Hole Punch: A hole punch can be used to create a hole for a tassel or ribbon.
- Ruler: A ruler is essential for measuring and cutting materials accurately.
- Pencil: A pencil is useful for sketching designs and marking measurements.
This is just a basic list of essential tools and materials. You can add or subtract items depending on the specific type of bookmarks you plan to make. Don't be afraid to get creative and experiment with different materials and techniques. The most important thing is to have fun and let your imagination run wild!
Bookmark Design Tips for Stunning Results
This section aims to provide practical design tips to help readers create visually appealing and well-designed bookmarks. It covers aspects like color theory, typography, pattern design, and the use of negative space. This empowers readers to create bookmarks that are not only functional but also aesthetically pleasing.
Creating a stunning bookmark is about more than just slapping some materials together. A little bit of design know-how can go a long way in transforming your creation from ordinary to extraordinary. Here are a few design tips to help you achieve stunning results:
- Color Theory: Understanding color theory can help you create visually appealing color combinations. Consider using complementary colors, analogous colors, or a monochromatic color scheme.
- Typography: If you plan to include text on your bookmark, choose a font that is easy to read and that complements the overall design. Experiment with different font sizes, styles, and weights.
- Pattern Design: Create a repeating pattern using stamps, stencils, or freehand drawing. Consider using geometric shapes, floral motifs, or abstract designs.
- Negative Space: Don't be afraid to leave some blank space on your bookmark. Negative space can help to create a sense of balance and visual interest.
- Balance: Strive for balance in your design. This can be achieved through symmetry, asymmetry, or radial balance.
- Contrast: Use contrast to create visual interest and highlight important elements. This can be achieved through color, texture, or size.
Remember, design is a process of experimentation and refinement. Don't be afraid to try different things and see what works best for you. The most important thing is to have fun and create something that you love!
Adding Personal Touches: Making Your Bookmark Uniquely You
The section is aimed to provide guidance on incorporating personal touches into DIY bookmarks, such as adding monograms, quotes, inside jokes, or elements that reflect the reader's hobbies and interests. This encourages readers to create bookmarks that are truly unique and meaningful to them.
While following design principles is important, the real magic of DIY bookmarks lies in adding personal touches that make them uniquely you. This is where you can truly let your personality shine and create bookmarks that reflect your passions, interests, and memories. Here are a few ideas to get you started:
- Monograms: Add your initials to your bookmark for a personalized touch. You can use stencils, stamps, or freehand lettering.
- Quotes: Choose a quote from your favorite book, movie, or song. This is a great way to add a touch of inspiration or humor to your bookmark.
- Inside Jokes: Incorporate an inside joke that you share with a friend or loved one. This will make your bookmark a special reminder of your shared connection.
- Hobbies and Interests: Reflect your hobbies and interests in your bookmark design. If you love gardening, you could use pressed flowers or leaves. If you love music, you could incorporate musical notes or instruments.
- Photos: Add a small photo of yourself, your pet, or a loved one. This is a great way to personalize your bookmark and make it a cherished keepsake.
Don't be afraid to get creative and experiment with different ways to personalize your bookmarks. The goal is to create something that is truly unique and meaningful to you. Let your imagination run wild and have fun with it!
Fun Facts About Bookmarks You Probably Didn't Know
This section aims to entertain readers with interesting and surprising facts about bookmarks, such as their origins, evolution, and cultural significance. This adds a layer of fun and intrigue to the topic, making it more memorable and engaging.
Did you know that the earliest known bookmarks were used in ancient Egypt? These bookmarks were made of papyrus and were used to mark pages in scrolls. Talk about ancient tech! Or how about this: during the Middle Ages, bookmarks were often made of parchment or vellum and were attached to the spine of the book with a ribbon or chain. Imagine lugging that around!
Here's another fun fact: in the Victorian era, bookmarks became a popular collectible item, with a wide range of materials and styles available, from silk ribbons and beaded tassels to silver filigree and hand-painted porcelain. Collecting bookmarks was all the rage! And did you know that some bookmarks are considered to be works of art? Museums around the world display antique and rare bookmarks as part of their collections.
Finally, here's a quirky fact: there's even a name for the study of bookmarks – it's called "librobromideplax"! Try saying that five times fast. Learning about the history and evolution of bookmarks adds a new dimension to the DIY experience, connecting us to a long and rich tradition of book lovers and their ingenious ways of keeping their place. So, the next time you create a DIY bookmark, remember that you're participating in a centuries-old tradition!
Step-by-Step Guide: Creating a Simple Washi Tape Bookmark
This section aims to provide a detailed, step-by-step guide on how to create a specific type of DIY bookmark, using washi tape as the primary material. It includes clear instructions, visual aids, and tips for troubleshooting common issues. This ensures that readers have the knowledge and confidence to successfully complete a DIY bookmark project.
Ready to put your newfound knowledge to the test? Let's create a simple yet stylish washi tape bookmark. This project is perfect for beginners and requires minimal supplies. Here's a step-by-step guide:
- Gather your supplies: You'll need cardstock, washi tape, scissors, a ruler, and a hole punch (optional).
- Cut the cardstock: Cut a strip of cardstock to your desired bookmark size. A good size is about 2 inches wide and 6 inches long.
- Apply the washi tape: Cover one side of the cardstock with washi tape, overlapping the edges slightly.
- Trim the edges: Flip the cardstock over and trim the excess washi tape along the edges using your scissors.
- Add a design (optional): Add additional strips of washi tape in different patterns or colors to create a unique design.
- Punch a hole (optional): If desired, use a hole punch to create a hole at the top of the bookmark.
- Add a tassel or ribbon (optional): Thread a tassel or ribbon through the hole to add a finishing touch.
And there you have it! A simple yet stylish washi tape bookmark that you can be proud of. This project is a great way to use up leftover washi tape scraps and create personalized bookmarks for yourself or as gifts. Don't be afraid to experiment with different colors, patterns, and designs to create bookmarks that are uniquely your own.
What If My DIY Bookmark Falls Apart? Troubleshooting Tips
The intention of this section is to address potential problems that readers might encounter while making DIY bookmarks, such as flimsy materials, weak glue, or uneven cuts. It offers practical solutions and troubleshooting tips to help readers overcome these challenges and create durable and long-lasting bookmarks.
Even with the best intentions, DIY projects can sometimes go awry. What if your beautiful DIY bookmark starts to fall apart after only a few uses? Don't despair! Here are a few troubleshooting tips to help you rescue your creation and ensure it lasts:
- Flimsy Materials: If your bookmark is made from flimsy materials like thin paper, consider laminating it to add durability. Alternatively, you can reinforce the bookmark with a layer of cardstock or fabric.
- Weak Glue: If the glue you're using isn't strong enough, try using a different type of glue. Craft glue, hot glue, or even super glue can provide a stronger bond.
- Uneven Cuts: If your cuts are uneven, try using a ruler and a sharp craft knife to achieve cleaner, more precise cuts.
- Tassels Falling Off: If your tassel keeps falling off, try using a stronger adhesive to secure it to the bookmark. You can also try threading the tassel through a hole in the bookmark and knotting it securely.
- Washi Tape Peeling: If your washi tape is peeling off, try pressing it down firmly and applying a thin layer of clear nail polish to seal it.
Remember, even the most experienced crafters encounter occasional mishaps. Don't be discouraged if your first attempt isn't perfect. Just learn from your mistakes and keep experimenting until you achieve the desired result. With a little bit of patience and perseverance, you'll be creating beautiful and durable DIY bookmarks in no time!
10 Creative DIY Bookmark Ideas to Spark Your Imagination
The intention of this section is to provide a curated list of ten unique and creative DIY bookmark ideas, ranging from simple and easy to more complex and challenging. This serves as a source of inspiration for readers and encourages them to explore different materials, techniques, and designs.
Need some inspiration to get your creative juices flowing? Here are ten creative DIY bookmark ideas to spark your imagination:
- Pressed Flower Bookmarks: Preserve the beauty of nature by pressing flowers and leaves and using them to create delicate and ethereal bookmarks.
- Embroidered Bookmarks: Add a touch of elegance and texture to your bookmarks with simple embroidery stitches.
- Beaded Bookmarks: String beads onto wire or thread to create colorful and whimsical bookmarks.
- Painted Rock Bookmarks: Paint small rocks with vibrant colors and designs to create unique and earthy bookmarks.
- Corner Bookmarks: Fold paper or fabric into a triangle shape to create a convenient corner bookmark that slips onto the page.
- Magnetic Bookmarks: Use magnets to create a bookmark that securely clips onto the page without slipping.
- Origami Bookmarks: Fold paper into intricate origami shapes to create eye-catching and unique bookmarks.
- Quilled Bookmarks: Roll strips of paper into intricate shapes and glue them together to create stunning quilled bookmarks.
- Knitted or Crocheted Bookmarks: Use yarn and needles or a hook to create cozy and textured bookmarks.
- Upcycled Bookmarks: Repurpose old materials like fabric scraps, buttons, or even old book pages to create eco-friendly and unique bookmarks.
These are just a few ideas to get you started. The possibilities are truly endless. Don't be afraid to think outside the box and experiment with different materials, techniques, and designs to create bookmarks that are uniquely your own.
Conclusion of DIY Bookmarks Using Household Supplies
Creating your own bookmarks is a fun, easy, and affordable way to add a personal touch to your reading experience. By using readily available household supplies, you can unleash your creativity and transform ordinary items into unique and functional page markers. Whether you're a seasoned crafter or a complete beginner, there's a DIY bookmark project out there for you. So, gather your supplies, let your imagination run wild, and get ready to create bookmarks that are as unique and special as the books they mark!